Student Add
Please follow steps to add a new student in the MilGrasp Database.
1
Add Student
2
Subject Assign
3
Fees Assign
4
Signup
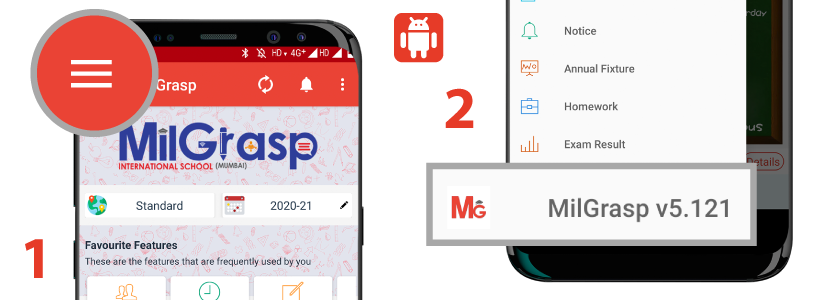
Click on Menu from ☰ Left side of your login screen
1. Add Student
- Go to https://##subdomain##.milgrasp.com/#/web/AddNewStudent
- Click on Add Button [+] or Quick Add Button [+]
- Fill-up All Mandatory details.
- From Father & Mother fill up any 1 preferred contact details in the student section.
- Upload Students photo
- Upload Parents Photo in Father & Mother’s section respectively
- Click Continue and Click Submit
Note: Make sure you upload students’ photos along with their parent’s photos if available. Also, mention the email address and contact details.
Explanation: Contact details are mandatory to do any fromm of communication with parents via email or SMS.
2. Subject Assign
- https://##subdomain##.milgrasp.com/Web/#/AcademicConfigurator
- Go to 7th Tab “ Subject Student Allocation”
- Click on Add Button [+]
- Select Semester & Class & than select students in the dropdown list. Click on Next
- Select the subject from the given subject list & submit
Note: If this step is not followed after adding a student, their name won’t be appearing in notes, homework & in Student & parent login they won’t be able to see the timetable.
Explanation: This Feature is an important aspect of the app structure. Throughout the app Wherever student name will be visible will depend upon their subject allocation & in their student/parent login what they will see will be decided in this feature
3.Fees Assign
- Go to https://##subdomain##.milgrasp.com/Web/#/FeesConfigurator
- Go to 4th Tab of Fees assign
- In the search bar, search for the child whom you want to assign fees
- Click on Add button
- Select Profile
- Check the number of installments applicable
- Click on submit
4.Sign Up
- Go to https://##subdomain##.milgrasp.com/
- Click on signup
- Enter the child’s barcode for whom you want to sign up
- Select Relationship. For example self, mother, father and click next
- Enter the date of birth of that child & click next
- Confirm the child details and click on next
- Set up the username and password and enter the email address and contact details if not there & click on next
- Enter the answers to all the 3 security questions & click on submit
- Do the same process for Remaining 2 relationships.
Staff Add
1
Add Student
2
Subject Assign
3
Fees Assign
4
Signup
1. Add Staff
- Go to https://##subdomain##.milgrasp.com/Web/#/HRMSConfigurator
- Click on Add Button [+] or Quick Add Button [+]
- Fill-up All Mandatory details.
- Add the official email address and contact details
- Click on App user check box and then submit
- Upload Staff Photo
- Staff Sign Up
- Go to https://##subdomain##.milgrasp.com/
- Click on signup
- Enter the date of birth click next
- Confirm the staff details and click on next
- Set up the username and password and enter the email address and contact details if not there & click on next
- Enter the answers to all the 3 security questions & click on submit.
Admissions Enquiry
1
Add Enquiry
2
Update Status
3
Send SMS/Email
4
View Statistics
5
Make Permanent
Fees Assign
1
Add Category
2
Fees Profile
3
Fees Assign
- Go to ##subdomain##.milgrasp.com/Web/#/FeesConfiguratorAdv
- Go to fees category tab
- To add a category click on the add button. Fill the category name. Select if the category is Refundable or non-refundable. If you have added fees category go to fees profile. You can fill the amount when the category is non-variable. Click on Submit. A variable is a category in which the amount may fluctuate sometimes Non- variable is a category which will be constant.
- Goo to Next tab i.e Fees Profile.
- Click on the add button. Select the class from the drop-down list for which you want to assign the fees. Enter the name of your profile & select how many installments you want to assign. Click on Next
- You will now have to select what categories are applicable to the class in that particular profile. Click on the checkboxes as per the requirement in the Select Category Section.
- Now if there is any discount to be given in a specific category, check the checkbox against the category in Discount Section.
- If you want to give a discount percentage wise click on the percentage checkbox and enter the percentage you want to give a discount. If you want to give a flat discount on the total amount just write the amount in the amount section. For example a discount of Rs 500. Do the same process for the categories where you want to give a discount. Click on Next Button
- Now you will see the installment section. Select the checkboxes as per the number of installments. If the Total amount and Payable amount is equal click on submit. If you want to assign the fees to the class click on Submit & Assign.
- You will now see the fees assigned window. Select the student to whom you want to assign fees. If the same fees is applicable to all the students you can click on the select all button. Click on Submit
- You will see a popup of fees assigned successfully.
Fees Collection
1
Fees Collection
2
Fees Print
3
Fees Dashboard
- Go to fees collection from the sidebar
- ##subdomain##.milgrasp.com/Web/#/FeesReceived
- There you will see an add button against the name of the child. Click on the add button
- Select the installment for which you will be collecting the fees. You can also select multiple installments at the same time. Click on Next.
- If you are levied any penalty you can add the amount in the Penalty Section. Enter the amount that you have received in the Amount column.
- Select Payment Mode & Enter the amount you are collecting. You can also enter the bank name Ref number and a note if any. To Add another payment mode you can click on add button. Again fill in the amount & bank details (if available).
- If you want to print a receipt you can click on Submit and Print. You will be taken to the Print Window.
- This is how you can do fees collection for any child in your school.
02 – Fees Collection from Dashboard ##subdomain##.milgrasp.com/Web/#/DashboardAdv Click on this link
- You can see search box from top right corner Search the student name whom you want to collect fees
- After that, you can see the fees box click on that and all fees related details will visible here
- On The top right corner there’s fees collection box
- Select the installment for which you will be collecting the fees. You can also select multiple installments at the same time. Click on Next.
- If you are levied any penalty you can add the amount in the Penalty Section. Enter the amount that you have received in the Amount column.
- Select Payment Mode & Enter the amount you are collecting. You can also enter the bank name Ref number and a note if any. To Add another
- payment mode you can click on add button. Again fill in the amount & bank details (if available).
- If you want to print a receipt you can click on Submit and Print. You will be taken to the Print Window.
- This is how you can do fees collection for any child in your school.
03.Fees Dashboard
- From Left sidebar go to fees dashboard ##subdomain##.milgrasp.com/Web/#/FeesMaster
- Here you can see the total fees of your school
Actual Fees, Discounted Fees, Payable Fees, Fees Collected & Remaining Fees - Below you can see the section wise fees. To see the fees of a particular section click on the view button. You will see the list of classes in that section.
- Further if you want to see the fees of a particular class click on the view button you will see the divisions in the same if any.
- To have a look at the fees of a particular division click on the view button and you will see the list of the students in that class and you can see their fees( by clicking on the view button) against the student name.
Fees Reports
1
Overall
2
Category
3
Discount
4
Day Wise
5
Receipt Wise
6
Receipt Wise Cancelled
1. For Fees Reports go to this URL
- Fees OVERALL Report
- Here you will see the list of all the students with their fees installment wise. If you want to see the fees of a particular class or section , you can select the class from the drop down list and click on the Apply Button.
- Further if you want see installment wise fees you may select the installment from the drop down list and click on Apply button
- If you want to seel the defaulters list you may check the box again Defaulters and you will see the list of students accordingly.